Drywall Repair in Riverside, CA
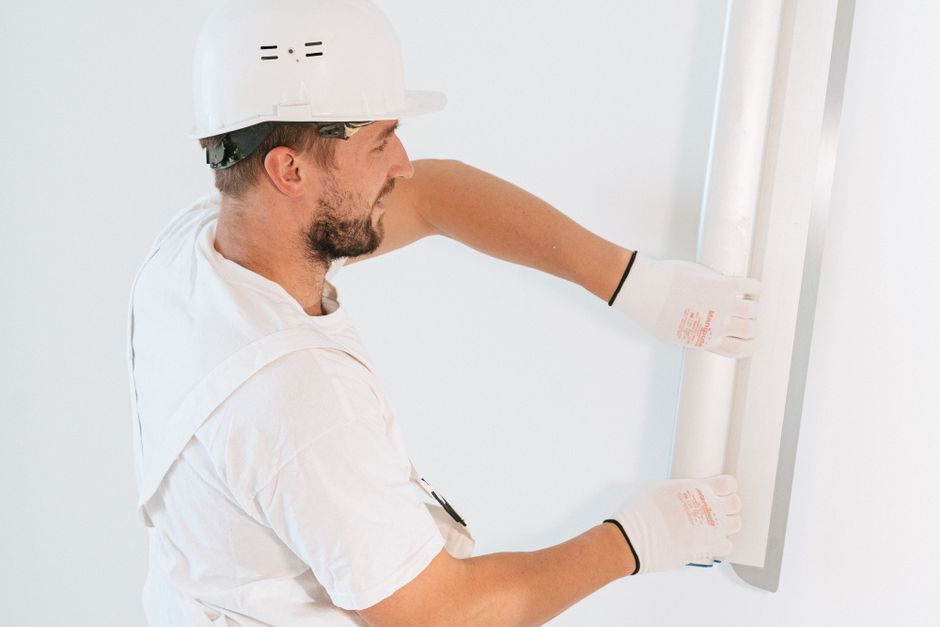
Plain notes on drywall repair in Riverside, CA: patching holes, closing cracks, matching texture and drying out water damage before the walls are painted.
What We Cover
- Drywall after a leak in a hot dry climate Dealing with a water stain or soft spot on a wall or ceiling when the air dries it out fast.
- Fixing nail pops and screw pops in older houses Why fasteners push through the paint on ceilings and walls in older homes and how to set them right.
- How to judge a drywall repair before paint goes on A flashlight, a sanding block and a primer coat show whether a patch is ready to be painted.
- Matching wall texture after a drywall patch Knockdown, orange peel and skip trowel finishes and how a patch is blended so it disappears.
- Patching a doorknob hole in a Riverside wall How a small round hole in hollow drywall gets backed, filled and sanded flat in a Riverside home.
- Why Riverside homes get hairline wall cracks Where hairline cracks start in Inland Empire houses, from slab movement to dry air, and how they are repaired.
Drywall Repair in Riverside, CA
Most drywall repair in Riverside comes down to small, ordinary damage: a doorknob hole, a crack over a door frame, a patch where a towel bar tore out, a ceiling stain after a slow leak. Each one is a few hours of work spread over two or three days, because joint compound has to dry between coats. The crew's job is to leave a wall that nobody can find the repair on.
Holes, cracks and patches
A hole is cut back to sound board, backed if it is wide, and filled with setting compound before lighter coats go on. Cracks are cut out and retaped, since paint alone never holds a moving joint. Houses across the Inland Empire flex with the heat, and the older ones near Mount Rubidoux and Fairmount Park carry decades of that movement in their ceiling lines.
Texture and finish
A patch only disappears once the texture matches. Orange peel, knockdown and smooth skim coats each need a different hand, and the sample is checked against the wall before anything is sprayed. Primer goes over the patch and paint goes corner to corner, so the old and new surfaces read the same under afternoon light.
Water and moisture
A stain on a ceiling in Riverside often traces back to an air handler in the attic or a pipe near the Santa Ana River side of town where older plumbing still runs. The leak is found first, the soft board is cut out, and the cavity is dried before new board and stain-blocking primer go in. Bathrooms and laundry rooms get moisture-resistant board.
Guides
The pages here walk through patching a doorknob hole, why hairline cracks open, matching texture, repairing after a leak, fixing nail pops, and judging a patch before paint. Two longer articles cover related questions from homes around Riverside, CA.
Latest Guides
Getting a Riverside room ready for drywall repair
2026-10-06
Most of the trouble in a drywall repair shows up before the first knife of compound goes on. Dust travels into every room, the furniture is in the way, the wall is still damp from the leak that caused the damage, or the old paint is peeling at the edges of the patch. A few hours of preparation in a Riverside house saves a day of rework, and the steps are the same whether the damage is a single hole or a whole stretch of wall.
What should be moved out of the room first?
Everything that can be carried comes out: lamps, rugs, wall art, curtains and anything on a shelf near the repair. Large furniture that cannot leave gets pulled to the middle of the room, away from the wall, and wrapped in plastic sheeting. Sanding joint compound makes a fine white powder that gets into upholstery, vents and the gaps around books, and it does not wipe off cleanly once it settles.
Switch plates and outlet covers come off as well, because compound lands on them and a repair that stops short of the outlet box looks unfinished. Take a photo of the wiring behind a cover before removing it if there is any doubt about which wire goes where. If the repair is close to a light fixture or smoke detector, turn off the breaker for that circuit before anyone works nearby.
How is dust kept from spreading through the house?
Dust control has three parts: sealing the room, catching dust at the source, and cleaning in the right order. Sealing means taping plastic sheeting over the doorway and closing the heating and cooling vent in the room. In the Inland Empire the air conditioner runs for much of the year, and an open return vent will pull fine drywall dust into the ductwork and distribute it through the whole house.
Catching dust at the source means sanding with a pole sander or a hand block attached to a vacuum hose, or using a damp sponge on the final pass. A wet sponge leaves a very light surface on the compound and puts almost nothing in the air, though it takes more care near the edges of a patch. Cleaning goes from top to bottom: ceiling and walls, then the floor, and a vacuum with a fine filter, not a broom, which only lifts the dust back into the room.
How dry does the wall need to be?
A wall that feels dry to the hand can still be damp at the core. After a plumbing leak or a roof leak the gypsum board holds moisture longer than the paper face suggests, especially along the bottom edge and around the framing. A pin-type moisture meter pressed into the board will read the water content, and the numbers should match a section of untouched wall in the same room before any compound goes over the damaged area.
Riverside's dry air helps a great deal. A room with the windows cracked and a fan running will often dry out in a day or two in summer, where a coastal house might take a week. The Box Springs Mountains channel warm, dry air through the valley for much of the year, and that same dryness can cause trouble later, since compound applied over a wall that is still damp will blister and shrink as the moisture leaves.
What happens with old paint around the repair?
Loose paint is removed first. Scrape the area around the damage with a flexible putty knife until the blade stops catching on flakes. Paint that is still tight to the surface can stay, but the edge where it meets bare board has to be feathered with sandpaper, since an abrupt step in the paint will show through the new coats as a ridge. In older homes near the University of California Riverside campus and downtown, there may be several layers of paint, some of them oil-based, and these chip in sheets rather than flakes.
Houses built before the late 1970s can have lead in the paint, and sanding it releases dust that is hazardous to breathe. The sensible approach is to test the paint with a home kit before any sanding, and to hire a certified renovator when the result is positive. Dry sanding old paint with an unknown history is the one step in preparation that cannot be undone once the dust is in the air.
Do the edges of a hole need any shaping?
Yes. A hole with ragged paper edges takes compound badly, because loose paper fibers lift and bubble as the mud dries. The edges should be cut with a utility knife so the paper is cleanly severed, with the cut sloping slightly inward toward the center. Where the paper face has torn away from the gypsum core around the hole, cut back until the paper holds firmly when pressed with a finger.
A square or rectangular opening is easier to patch than a circle, because a straight-edged piece of new board fits tightly against four straight sides. Draw the square around the damage with a pencil and a straightedge, cut along the lines with a drywall saw or a knife, and the patch piece can be traced directly from the opening. Leave the corners square and slightly sharp, since a rounded corner leaves a gap that takes extra compound to fill.
What tools and materials should be on hand?
A tidy set of materials makes the work go in order, with no stopping halfway to find something. For most patches the list is short:
- A utility knife with fresh blades and a drywall saw
- Six inch and ten inch taping knives, plus a mud pan
- Setting compound for the first pass and all purpose compound for the finishing coats
- Mesh tape or paper tape, matched to the type of seam
- A pole sander, fine sanding sponges and a dust mask rated for fine particles
- Drop cloths, plastic sheeting and painter's tape
- Primer, a roller, and a small brush for cutting in
Mixing is where many beginners lose time. Setting compound hardens on a clock, so only as much as can be used in about twenty minutes should be mixed at once. Ready-mixed all purpose compound keeps for months in a closed bucket, and a small amount can be thinned with a splash of water to improve how it spreads on the final coats.
How long should the whole job be allowed to take?
A single small patch takes two or three working sessions, with the drying time between them being the real schedule. A hole filled with setting compound can take a second coat after an hour or so. Coats of all purpose compound need to dry overnight in most conditions, and a thicker application takes longer. Sanding, priming and painting add another day if each step is allowed its full cure time.
Rushing the cure is the most common way to ruin an otherwise clean repair. Compound that looks dry on the surface can still be wet beneath, and sanding it clogs the paper, smears the surface and leaves a rough patch that has to be redone. Pressing a thumbnail into the edge of the compound is a simple test: if it leaves a mark, the coat is not ready.
Is it worth checking the wall behind the repair?
Before closing up any opening larger than a hand, look into the cavity with a flashlight. Wiring, pipes and insulation are all visible, and so are signs of earlier trouble, such as stained wood, rusted fasteners or a musty smell. In houses near the Santa Ana River, where the ground stays damp in places, moisture problems in a wall cavity are worth a closer look before a new piece of board hides them.
Where do Riverside homes differ from others?
Riverside County covers a wide range of housing, from Craftsman bungalows around the Mission Inn district to tract houses built in the decades after the war, and each style brings its own repair conditions. Older plaster-and-lath walls look like drywall from the outside but behave differently, and a plaster wall needs a different patching method. A quick knock on the wall tells the story: plaster sounds hard and dense, while drywall sounds hollow.
What is the last check before work starts?
Walk the room once more with a flashlight: floor covered, vent sealed, covers off, edges cut clean and the board behind dry. With those in place, the repair itself is the easy part.
Repairing a crushed outside corner on a wall
2026-10-06
Why do outside corners take the damage?
An outside corner is the one place where two walls meet and stick out into the room. Furniture, vacuum cleaners, shopping bags and moving boxes all find it first. A hallway corner in a Riverside house can take a hundred small knocks over the years, and the drywall there has almost nothing protecting it except a thin strip of metal or paper-faced bead under a few coats of compound.
The damage comes in three forms. A dent is a shallow dimple where the bead is pushed in but still attached. A chip is a missing piece of compound that exposes the bead or the board edge. A crush is the serious one: the bead is bent flat, the gypsum underneath has crumbled, and the corner has lost its straight line. Each form needs a different level of repair, and picking the right one at the start saves time.
How do the three kinds of damage compare?
Damage What it looks like Repair Sessions Dent Small dimple, bead still straight Fill with setting compound, two finish coats Two Chip Compound missing, bead or board edge showing Scrape loose material, rebuild with compound, check the bead for rust Two to three Crush Bead bent, board crumbled, line lost Cut out the section, replace the board and the bead, finish from scratch Three or more The sessions column is about drying time, not working time. Most of the hours are spent waiting for compound to set, and a corner that is rushed almost always shows a ridge after painting.
What tells a dent from a crush?
Press a thumb into the damage. A dent feels firm underneath, because the gypsum is intact and only the surface has moved. A crush feels soft or gives way, and the bead may rattle if it is loose. Run a straightedge down the corner as well. If the bead is bent more than a quarter inch off the line, no amount of compound will hide it, and the bead has to come off.
Rust is a second warning sign. Metal bead that has been wet, or that was never coated well, leaves brown stains that bleed through paint. A stain at a corner is a signal to look at the bead itself, not just the paint, since rust expands and pushes the compound off from underneath.
How is a dent repaired?
A dent is the simplest case. Sand the area lightly to knock off any raised edges and wipe away the dust. Mix a small batch of setting compound and press it into the dimple with a four inch knife, drawing the blade along the corner rather than across it so the bead guides the edge. Leave the fill slightly proud, since compound shrinks as it hardens.
Once it has set, sand it flush with a fine sponge, then apply a thin coat of all purpose compound on each side of the corner, feathering it two or three inches out. A second coat the next day finishes the repair. Corners need a light touch because the knife rides on the bead, and pressing hard will scrape the new compound right back off.
How is a chip rebuilt?
Chips need the loose material removed first. Use a putty knife to scrape away anything that crumbles, down to solid compound or paper. Check the bead where it shows: if the metal is straight and tightly fastened, it stays, and a coat of primer on any bare steel prevents rust. If it flexes or has pulled away from the board, add a few drywall screws through the flange into the stud or the edge of the board.
Rebuilding the profile is done with setting compound in two thin passes, one side of the corner at a time. Work one face, let it harden, then do the other. Doing both sides at once leaves the knife with nothing to rest on and the corner comes out round. A sharp corner needs one edge set first as a guide for the second.
When does a crushed corner need new bead?
A crush calls for a rebuild. Mark the damaged stretch with a pencil, usually a section a foot or two long, and cut the old bead with tin snips at both ends. Pry out the damaged piece and look at the board behind it. If the gypsum has crumbled, cut it back to solid board with a utility knife and replace it with a patch of half inch board screwed to the framing.
A new piece of metal or paper-faced bead is cut to length, set against the corner and checked with a level. It is fastened with screws or nails every eight inches or so along both flanges, with the heads just below the surface. Vinyl bead and metal bead both work, though metal holds a sharper edge and takes a hit better. In a busy hallway the extra strength is worth having.
What goes on top of new bead?
Corner bead is covered in at least three coats, each one wider than the last. The first coat is setting compound pressed firmly over the flanges, with the knife riding on the bead. The second coat is all purpose compound, spread about six inches from the corner on each side. The third is a thin coat of topping compound feathered out wider still.
- First coat: setting compound, knife resting on the bead, scraped nearly clean
- Second coat: all purpose compound, wider by two inches on each side
- Third coat: topping compound, thin and feathered, sanded smooth when dry
Each coat needs to dry fully before the next. The edge of the bead itself should show only as a faint line when finished, with no metal or paper visible. A corner that still shows bead after three coats needs a fourth, as the compound shrinks and exposes it.
How should the corner be sanded and checked?
Sanding is the step where corners are won or lost. A fine sponge used with light pressure and a wrapping motion softens the edge without cutting through to the bead. Sand with the long direction of the corner, not across it. If the sponge starts to show metal, stop and add another thin coat instead.
Check the result the way any patch is checked: a flashlight held flat along the wall throws a shadow on every ridge and hollow. Run a hand down the corner as well. A good outside corner feels straight, slightly rounded at the very edge and free of bumps. Prime it before paint, because raw compound at the corner soaks up paint and leaves a dull stripe.
What can be done to keep the corner from breaking again?
Most corner damage repeats in the same spot because the cause is the same. A hallway turn that gets struck by every vacuum cleaner will keep taking hits. A strip of clear corner guard, a wall bumper or a rearranged piece of furniture takes the knocks that would otherwise land on the compound. In homes around the Mission Inn district, where older houses have narrow hallways, a bumper strip is a common fix.
Houses in the Inland Empire also expand and contract with heat. Paper-faced bead handles this movement better than rigid metal because it bonds to the compound along its whole width. A thin line of flexible caulk at the ceiling line, where the corner meets the ceiling, keeps a hairline crack from running up the edge. These small details are cheap and take little time.
How long does an outside corner repair last?
A properly rebuilt corner lasts as long as the wall itself, provided the cause of the damage is dealt with. Done in thin coats with enough drying time, the repair is stronger than the original, since the new bead is fastened to the framing instead of floating on old compound. The finished corner should be straight, smooth and ready for paint.